Audio Recorder Types
Analog mini cassette recorders while being out dated are still a useful recording device if you already have one lying around. There are ways of digitizing your recordings via a crossover cable and the line-in or microphone input on your computer. The down side is the tapes may be hard to find and the recorder tends to add noise to the tapes.
Non PC interface digital recorders are a alternative to analog cassette recorders but most tend to compress the audio files in a way that limits the fidelity of the recordings, after all most of these recorders were designed to record just the human voice.
Recordings on this type of recorder can be transferred to your computer by using a 3.5m audio crossover cable by plugging one end into the recorders headphone jack and the other end into the line-in or microphone jack on your computer. Most audio editing software has a record feature by selecting the correct input settings with in the software. All you have to do is press play on your recorder and then click record button on your audio editing software. Using the line-in jack on your computer will give you the ability to monitor the audio feed into your computer for easier recording and editing.
USB interface digital audio recorders are nice entry level option with a verity of file formats that are less obtrusive on audio compression. These formats include; WMA (Windows Media Audio), MP3 and on the higher end recorders WAV files.
These types of recorders either use a standard type USB cable or have a built in USB plug as the one pictured to the left. These recorders can run from the low end to mid-range in cost ($50 to $150.00+), depending on brand and the features it has.
Next are the high end audio recorders. Used for the recording of live music, these recorders come with more features and usually have 2 or more of high quality internal microphones. And record in various quality WAV and MP3 formats such as the Zoom H2.External MicrophonesOmi-Directional Microphones
These microphones are used to capture sounds coming from all directions. And come in many different styles.
Directional Microphones
These microphones are used to capture sounds from a source in a known direction and must be pointed at the recording subject. Shotgun Microphone style and the Parabolic Microphone style.
Some external microphones require power supplied by the recorders microphone jack. Others are self powered and require batteries as the shotgun microphone pictured.
There are advantages to using powered microphones. Most will have different sensitivity settings and many will have built in preamps and in turn will have less distortion and lower self-noise. This will greatly improve your recordings. It will also allow you to lower your recorders gain setting and therefore introducing less self noise that is produced by most low to mid range audio recorders when using external microphones.
Not all microphones are compatible with all recorders there are three common types of microphone plugs; XLR, 1/4 inch and 3.5 mm (1/8 inch).Recorder Set upLocation & Placement are an important aspect when setting up your recording equipment. When ever possible you want to make sure that your recorder and microphone are in an area to limit noise pollution ether from your research group or near by roadways or other noise producing environments. This is not always possible but in doing so you will greatly increase your chances of getting quality recordings.
When doing field recording I prefer to be present. This puts me in the environment during a recording event. With that being said one of the problems with live recording is you’re generally not in a stationary position and may be carrying the audio recorder and microphone. This tends to introduce handling noise transferred to the microphone and adds noise to your recording.
One way to lessen this is to mount the recorder or external microphone to some type of shock mount. Another way I have tried was to clip a lapel microphone on the brim of my hat. This also limits noise from your clothing moving and also frees up your hands to carry other equipment.
The use of multiple recorders is also a good idea. You can set one up as a stationary recorder and carry one with you as a mobile recorder. A third recorder can be used as a drop recorder while hiking. You can place it along a trail or in an area and return later to collect it.
With these drop recorders you may want some way to conceal them for security reason, especially if you’re placing them along a prominent hiking trail. Making pouches from camouflage fabric works well. Just make sure you know where you left the recorder.
Just remember placing your recorder on the ground you are likely to capture audio from the small woodland creatures and you will need to determine if any audio event was from one of these little fellows.
You can also place your drop recorder in tree, on top of a large boulder or hang it from a fence post. This will get your recorder off of the ground and up to a higher position better enabling it to capture distant sounds.
I like to use a full size camera tripod when placing a recorder at a base camp. You can locate this recorder at a distance from your group limiting the noise pollution human speech and laughter. This will also give you steady mount that will allow you to point the recorder’s microphone(s) in any direction. I will also enable you to place your recorder in an open location that is unobstructed by objects that might other wise shield your recorder.
When doing field recording wind can be an issue. In mildly windy conditions a windscreen or wind muff can help eliminate most of the wind noise picked up by your microphone(s)
Weather Proofing & Concealment
As I mentioned before, you can conceal your recorders in small pouches made from camouflaged fabric. Another trick is to conceal your recorder in a used fast food drink cup. You can place your external microphones on a tree or other object and put your recorder inside the cup running your microphone cord through the straw hole while placing the cup/recorder on the ground. If you use the straw you will need to slice the straw down its length and snap it over the microphone cord. If placing this recording setup on state or federal lands I would recommend placing some sort of note in it with your recorder containing some sort of contact information and explaining that your recording rig is for wildlife research. You might check to see that there is no litter control pickup planed for that area.
Another way to concealment/weather proofing involves using a disposable baby bottle and liner. There are couple different ways to use this setup. Placing the recorder inside the bottle/liner with the external microphone cord running through the nipple or just place your recorder inside the bottle with its internal microphone(s) facing the bottom of the bottle with only the liner between it and the outside. Surprisingly the plastic liner doesn't degrade the recordings. You can paint the bottle and lid with a camouflage design. Inserting your recorder fully into the bottle will hide it fairly well.
Audio Editing Software
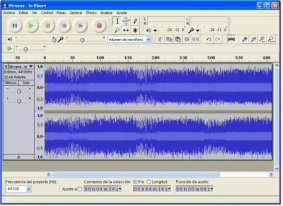
Once you have that incredible audio event recorded your going to need a way to edit, enhance and share your recording. There are numerous audio editing and recording software programs on the market and way too many of them to mention here. One that I will mention is a free program (yes it’s free) called Audacity and is available for download at the following link. www.audacity.sourceforge.net
Analog mini cassette recorders while being out dated are still a useful recording device if you already have one lying around. There are ways of digitizing your recordings via a crossover cable and the line-in or microphone input on your computer. The down side is the tapes may be hard to find and the recorder tends to add noise to the tapes.
Non PC interface digital recorders are a alternative to analog cassette recorders but most tend to compress the audio files in a way that limits the fidelity of the recordings, after all most of these recorders were designed to record just the human voice.
Recordings on this type of recorder can be transferred to your computer by using a 3.5m audio crossover cable by plugging one end into the recorders headphone jack and the other end into the line-in or microphone jack on your computer. Most audio editing software has a record feature by selecting the correct input settings with in the software. All you have to do is press play on your recorder and then click record button on your audio editing software. Using the line-in jack on your computer will give you the ability to monitor the audio feed into your computer for easier recording and editing.
USB interface digital audio recorders are nice entry level option with a verity of file formats that are less obtrusive on audio compression. These formats include; WMA (Windows Media Audio), MP3 and on the higher end recorders WAV files.
These types of recorders either use a standard type USB cable or have a built in USB plug as the one pictured to the left. These recorders can run from the low end to mid-range in cost ($50 to $150.00+), depending on brand and the features it has.
Next are the high end audio recorders. Used for the recording of live music, these recorders come with more features and usually have 2 or more of high quality internal microphones. And record in various quality WAV and MP3 formats such as the Zoom H2.External MicrophonesOmi-Directional Microphones
These microphones are used to capture sounds coming from all directions. And come in many different styles.
Directional Microphones
These microphones are used to capture sounds from a source in a known direction and must be pointed at the recording subject. Shotgun Microphone style and the Parabolic Microphone style.
Some external microphones require power supplied by the recorders microphone jack. Others are self powered and require batteries as the shotgun microphone pictured.
There are advantages to using powered microphones. Most will have different sensitivity settings and many will have built in preamps and in turn will have less distortion and lower self-noise. This will greatly improve your recordings. It will also allow you to lower your recorders gain setting and therefore introducing less self noise that is produced by most low to mid range audio recorders when using external microphones.
Not all microphones are compatible with all recorders there are three common types of microphone plugs; XLR, 1/4 inch and 3.5 mm (1/8 inch).Recorder Set upLocation & Placement are an important aspect when setting up your recording equipment. When ever possible you want to make sure that your recorder and microphone are in an area to limit noise pollution ether from your research group or near by roadways or other noise producing environments. This is not always possible but in doing so you will greatly increase your chances of getting quality recordings.
When doing field recording I prefer to be present. This puts me in the environment during a recording event. With that being said one of the problems with live recording is you’re generally not in a stationary position and may be carrying the audio recorder and microphone. This tends to introduce handling noise transferred to the microphone and adds noise to your recording.
One way to lessen this is to mount the recorder or external microphone to some type of shock mount. Another way I have tried was to clip a lapel microphone on the brim of my hat. This also limits noise from your clothing moving and also frees up your hands to carry other equipment.
The use of multiple recorders is also a good idea. You can set one up as a stationary recorder and carry one with you as a mobile recorder. A third recorder can be used as a drop recorder while hiking. You can place it along a trail or in an area and return later to collect it.
With these drop recorders you may want some way to conceal them for security reason, especially if you’re placing them along a prominent hiking trail. Making pouches from camouflage fabric works well. Just make sure you know where you left the recorder.
Just remember placing your recorder on the ground you are likely to capture audio from the small woodland creatures and you will need to determine if any audio event was from one of these little fellows.
You can also place your drop recorder in tree, on top of a large boulder or hang it from a fence post. This will get your recorder off of the ground and up to a higher position better enabling it to capture distant sounds.
I like to use a full size camera tripod when placing a recorder at a base camp. You can locate this recorder at a distance from your group limiting the noise pollution human speech and laughter. This will also give you steady mount that will allow you to point the recorder’s microphone(s) in any direction. I will also enable you to place your recorder in an open location that is unobstructed by objects that might other wise shield your recorder.
When doing field recording wind can be an issue. In mildly windy conditions a windscreen or wind muff can help eliminate most of the wind noise picked up by your microphone(s)
Weather Proofing & Concealment
As I mentioned before, you can conceal your recorders in small pouches made from camouflaged fabric. Another trick is to conceal your recorder in a used fast food drink cup. You can place your external microphones on a tree or other object and put your recorder inside the cup running your microphone cord through the straw hole while placing the cup/recorder on the ground. If you use the straw you will need to slice the straw down its length and snap it over the microphone cord. If placing this recording setup on state or federal lands I would recommend placing some sort of note in it with your recorder containing some sort of contact information and explaining that your recording rig is for wildlife research. You might check to see that there is no litter control pickup planed for that area.
Another way to concealment/weather proofing involves using a disposable baby bottle and liner. There are couple different ways to use this setup. Placing the recorder inside the bottle/liner with the external microphone cord running through the nipple or just place your recorder inside the bottle with its internal microphone(s) facing the bottom of the bottle with only the liner between it and the outside. Surprisingly the plastic liner doesn't degrade the recordings. You can paint the bottle and lid with a camouflage design. Inserting your recorder fully into the bottle will hide it fairly well.
Audio Editing Software
Once you have that incredible audio event recorded your going to need a way to edit, enhance and share your recording. There are numerous audio editing and recording software programs on the market and way too many of them to mention here. One that I will mention is a free program (yes it’s free) called Audacity and is available for download at the following link. www.audacity.sourceforge.net
 RSS Feed
